|
|
|
|
 |
 |
|
 |
|
 |
|
 |
|
|
Tack Trunk |
|
|
|
|
The next major project is a tack trunk for my daughter. There aren't many plans available online for a trunk that I like so I'm planning on creating my own.
|
Go to Top |
|
|
 |
|
 |
|
|
|
|
|
|
|
|
|
|
Flip Top Planer Cabinet |
|
|
|
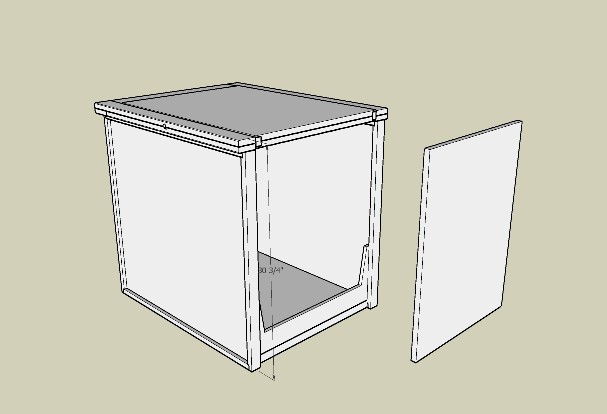
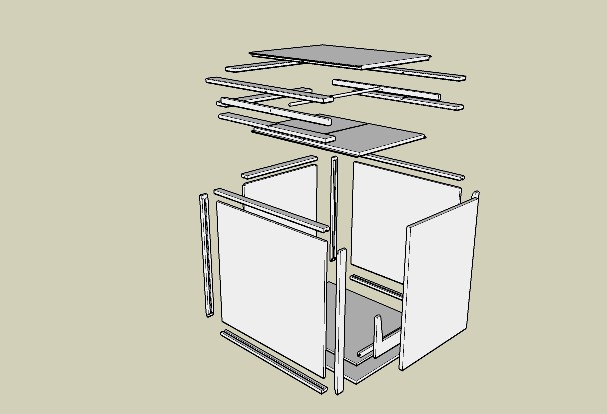
Nancy gave me a planer for my birthday this year (2008). Where to store the tool presents somewhat of a problem in the workshop. The planer is too heavy (about 90 lbs) to keep in a cabinet or on a shelve and only pull out when needed. Bench top space is too valuable to keep the tool out all the time. What I decided to do was to build a flip-top cabinet so that when the planer is not being used it can be stored in the cabinet and the top of the cabinet can be used as a work surface. When I want to use the planer I just flip the top and the planer is now usable. I'm also going to put the cabinet on casters and set the height of the cabinet to the same height as the table saw so that I can use it as an infeed or outfeed table.
I used a design from Wood magazine for the flip-top cabinet, changing the dimensions to match the planer size and the table saw height, and also added the casters. Here's a couple of shots of the shetchup design.
I've completed the construction of the cabinet, laminated the top and attached the planer. It works very well. I'll inlcuded some photos when I get a chance and maybe even a video of the the "flip". The cabinet still needs to be finished. I'm thinking of using a experimenting with gel stains ... maybe a nice cherry.
|
Go to Top |
|
|
|
|
|
|
|
|
|
|
|
|
|
|
|
|
DVD Player Cabinet |
|
|
|
I decide to build the DVD cabinet out of Maple because it was available locally. I used maple plywood for the carcase and top and maple stock for the trim.
The top is just a 12"x22" piece of plywood with maple edging that I ripped and mitered from a 1" x 4" maple board.
I did not want to use any fasteners to attach the edging to the plywood top and I don't own a biscuit jointer yet, so I decided to use splines to strengthen the joint between the edging and the plywood top. I cut a slot in the center of the 3 edging pieces and also along the three sides of the plywood top with the table saw. I ripped the splines from some of the scrap maple plywood. I needed to make a new jig to get the narrow splines, but this will come in handy on other projects I'm sure.
I had some trouble gluing up the plywood top and edging so once again I got out the picture frame jig. This helped, but I didn't get as much pressure to get a really tight fit as I wanted. I need to get more clamps !
The carcase went together very easily using brads and glue first and then strengthening it with #8 screws.
This will give you an idea of how the cabinet will look when it's done. Next step is to create the trim pieces from some 1" maple stock on the router. Stay tuned.
I tried some staining techniques on some of the scrap maple, but wasn't happy at all with the results. The mable just doesn't take stain well. I wanted to match the dark brown color of the bedroom furniture that the cabinet will be sitting on, but is was almost impossible to get the maple to take any stain. Even with an ebony stain. After some research I found that most woodworks that want to add a deep color to the maple use a dye stain to color the wood. I couldn't find any locally, so I ordered a Dark Walnut Trinstant Dye stain from Rockler. I'll give that a try to add some color to the wood.
I've finished adding the trim work and sanding the piece. It's ready for staining. Here's some pictures of the unfinished cabinet.
|
Go to Top |
|
|
|
|
|
|
|
|
|
|
|
|
 |
|
 |
|


